Quick Start
This guide walks through the current Cleotic setup flow and the project workflow you use after the first data arrives.
Sign up
- Go to Cleotic and click Get Started or Sign Up.
- Sign in through WorkOS with email/password or a supported identity provider.
- If this is your first time, create or name your organisation.
After sign-in, you land on Home.
Create your first project
From Home or Projects, click Create Project. Cleotic currently offers three setup paths.
The guided wizard creates the first monitoring scope as part of project setup:
- Brand: add your primary brand.
- Models: choose which AI models the first segment should query and set a refresh frequency.
- Prompts: write prompts or generate related ones with AI.
- Competitors: add, review, and refine the competitor set.
- Complete: confirm the segment's geography, language, and name, then start running prompts.
Follow the project workflow
After prompts have run, open the project and move through the main workflow:
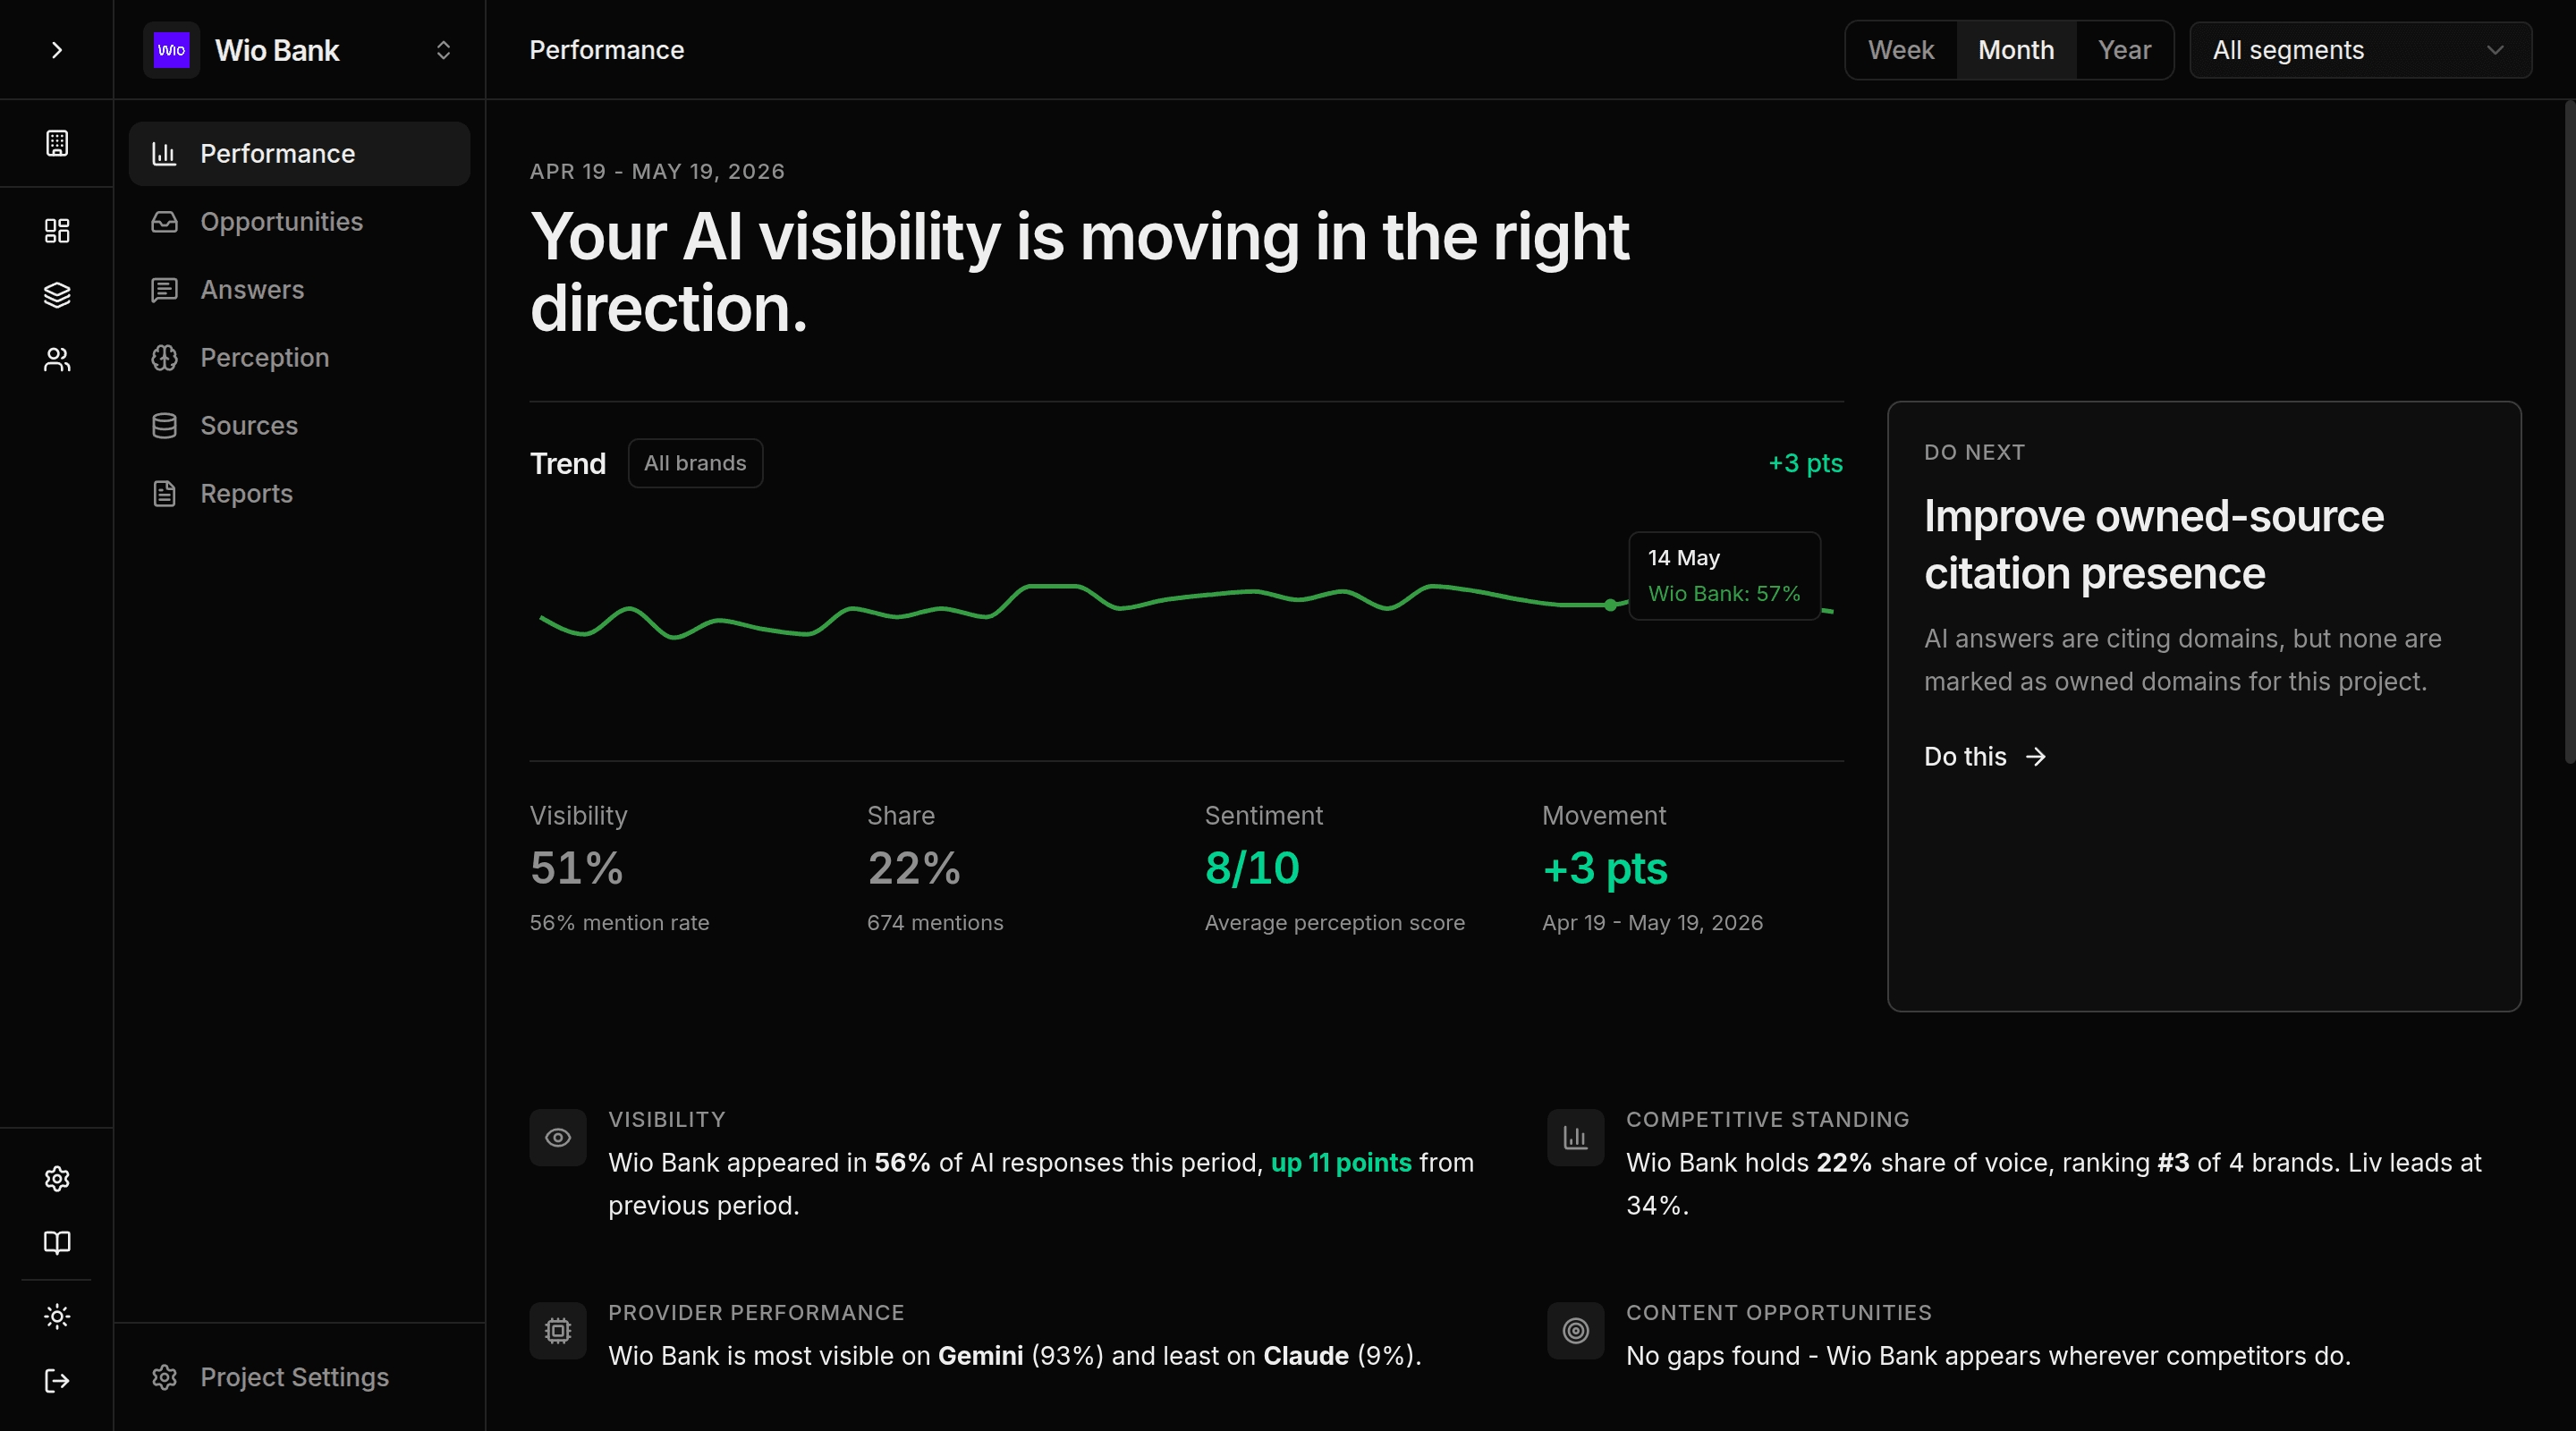
- Performance -- read headline visibility, share of voice, sentiment, trend movement, and next actions.
- Opportunities -- work through the prioritised action inbox across content, prompts, segments, sources, brand setup, and reports.
- Answers -- review prompts and the response evidence collected by your segments.
- Perception -- understand sentiment, brand language, and competitor positioning.
- Sources -- inspect citations, owned-domain tracking, crawlers, and AI referrals.
- Reports -- package the current project snapshot for stakeholders.
- Project Settings -- confirm brand setup, segment scope, access, Content Studio defaults, perception settings, and tracking foundations.
Initial response data usually appears within a few minutes after a run completes. Source tracking and referrals depend on your website installation and live traffic.
What to do next
- Refine setup: Project Settings and setup
- Add or review prompts: Answers and Prompts
- Check the project summary: Performance
- Read brand perception: Perception
- Prioritise actions: Opportunities
- Configure owned-domain tracking: Sources
- Create a public report: Reports